Using Slide Rules · Volume 1
How to Read & Operate a Slide Rule — Volume 1 — Anatomy and the Logarithmic Principle
What the parts are, why sliding multiplies, and how to read three figures off a piece of wood
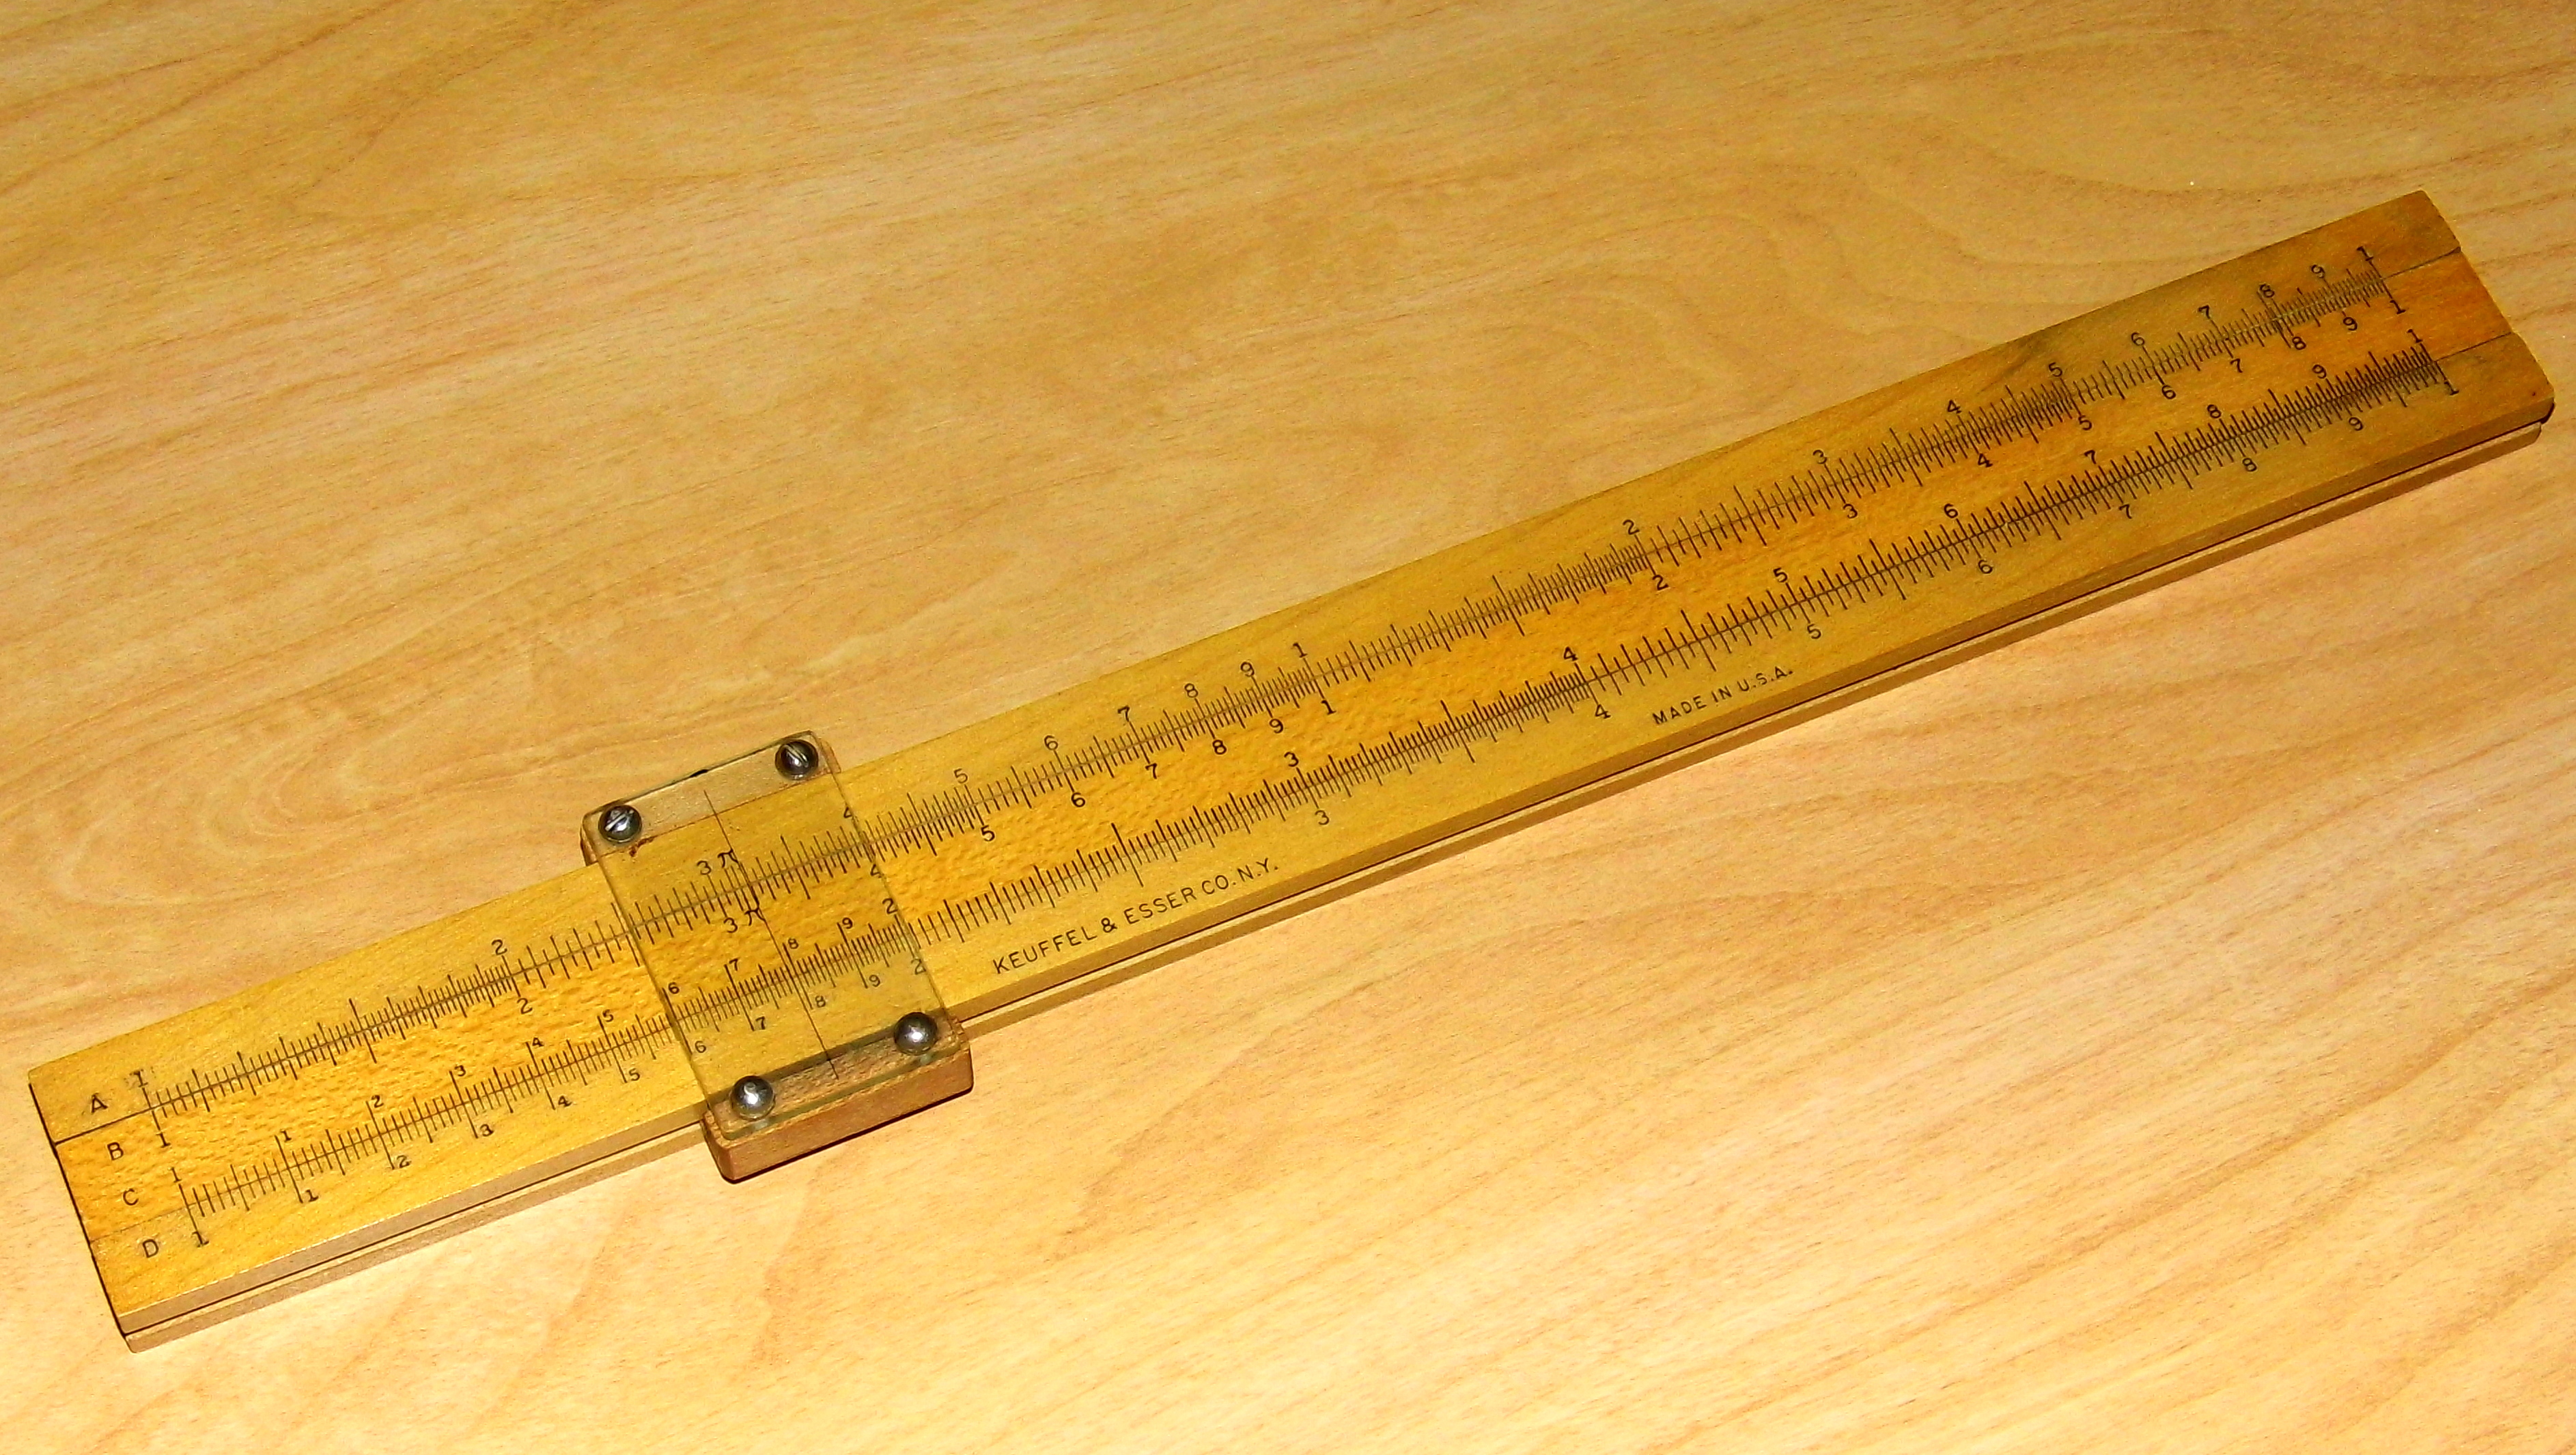
Figure 1 — A complete slide rule: the fixed outer body (stator), the central slide that moves left and right, and the glass cursor carrying a fine hairline. The A, B, C, and D scales are visible across the face. Image: “Vintage Keuffel & Esser Company Beginner’s Slide Rule, No. 4058C, All Wood Framed Cursor, Made In USA, Circa 1930s (46171984654)” by Joe Haupt from USA is licensed under CC BY-SA 2.0. To view a copy of this license, visit https://creativecommons.org/licenses/by-sa/2.0/.
1.1 About This Volume
This is the first volume of the companion unit to the History: a practical, hands-on guide to actually using a slide rule. It assumes nothing. Before a single multiplication can be performed, an operator needs to know what the three moving parts are called and what each one does, why pushing a slide back and forth produces a product rather than a sum, and how to read a number off a scale whose marks crowd together as they climb. This volume covers exactly that groundwork; the mechanics of multiplication and division — lining up the scales and reading off answers — begin in earnest in Vol 2.
1.1.1 Depth-Index: The Five-Volume How-To Unit
Table 1 — Depth-Index: The Five-Volume How-To Unit
| Vol | Title | Primary Content |
|---|---|---|
| 1 | Anatomy and the Logarithmic Principle (this volume) | Parts of the rule, why sliding multiplies, reading scales, significant figures, the decimal point, accuracy |
| 2 | Multiplication and Division | C and D, chained operations, the CI inverted scale, folded CF/DF, off-scale resets |
| 3 | Powers and Roots | A/B (squares), K (cubes), the log-log (LL) scales, eˣ |
| 4 | Trigonometry and Logarithms | S, ST, T scales, the L mantissa scale, gauge marks |
| 5 | Reading Circular and Cylindrical Rules | Wrap-around and spiral scales; Fowler, Otis King, Fuller |
Note — Cross-references appear as “see Vol N.” Each volume is self-contained; this one assumes no prior reading and no prior arithmetic beyond knowing what a logarithm is in principle.
1.2 The Three Moving Parts
Pick up any straight (linear) slide rule and three components present themselves. Learning their names is the whole of the vocabulary needed to follow every instruction in this unit.
1.2.1 The body (stator)
The body — also called the stator or base — is the fixed frame. On most rules it is built as two long rails held a fixed distance apart, with a channel running between them. The rails do not move; they are the reference against which everything else is measured. The scales printed along the inner edges of the body are the fixed scales. On a basic rule the D scale lives on the lower body rail and is the principal scale for reading answers.
1.2.2 The slide
The slide is the central strip that slides left and right within the channel of the body. Its scales — most importantly the C scale, which is identical to D — can be shifted bodily relative to the fixed scales. This sliding motion is the entire mechanism of the instrument. Sliding the C scale along the fixed D scale is what adds two logarithmic lengths together, and adding logarithms is what multiplies numbers. Everything else is refinement of that one act.
1.2.3 The cursor and its hairline
The cursor is the transparent window — glass on older rules, plastic on later ones — mounted in a frame that rides along the body and can be slid independently of the slide. Etched down the centre of the cursor is a single fine line called the hairline. The hairline does no arithmetic by itself; it is a precision pointer. Its job is to mark a position on one scale and carry that exact position across to another scale — for example, to transfer a reading from the C scale on the slide to the A scale on the body without losing a fraction of a graduation. Aligning the hairline by eye is the single most accuracy-critical habit an operator develops.
A duplex rule has scales on both faces and a cursor whose hairline is aligned front-to-back, so a value set on one side can be read on the other. Simplex rules carry scales on one face only. The naming of the parts is the same either way.
1.3 Why Sliding Multiplies
The reason a slide rule works is worth understanding rather than memorizing, because once the principle is clear, every scale on the instrument becomes self-explanatory.
A logarithm turns multiplication into addition. For any base,
10ᵃ × 10ᵇ = 10⁽ᵃ⁺ᵇ⁾
so the logarithm of a product is the sum of the logarithms: log(x × y) = log x + log y. The slide rule’s trick is to make that sum physical. On the C and D scales, a number is not placed at a position proportional to its own value, but at a distance proportional to its logarithm. The number 1 sits at the far left (log 1 = 0, so zero distance from the start). The number 2 sits about 0.301 of the way along the scale (because log 2 ≈ 0.301). The number 3 sits about 0.477 along (log 3 ≈ 0.477). The number 10 sits at the very end (log 10 = 1, the full length). This is why the marks crowd together toward the right-hand end: equal ratios occupy equal distances, so the gap from 1 to 2 is the same length as the gap from 2 to 4 or from 5 to 10.
Because position is logarithm, laying one length end-to-end with another adds the two logarithms — and therefore multiplies the two numbers.

Figure 2 — The principle in one picture. On a logarithmic scale, the distance from 1 to 2 is log 2 ≈ 0.301 of the scale length; the distance representing 3 is log 3 ≈ 0.477. Lay them end to end and the combined length is 0.301 + 0.477 ≈ 0.778, which is exactly log 6 — so the far end lands on 6. The lengths added; the numbers multiplied: 2 × 3 = 6. Image: Original diagram by the Slide Rules project.
A slide rule simply automates that end-to-end addition. Instead of stepping off lengths with dividers (the older method described in the History), the operator slides the C scale so that its starting mark sits over the first number on D; the C scale’s own graduations then measure off the second length from that new starting point, and the answer is read on D underneath. The physical act of sliding is the act of adding the logarithms. The detailed procedure — which index to use, what to do when the answer runs off the end — is the business of Vol 2; here it is enough to see why it must work.
1.4 Reading the Scales
The C and D scales are the heart of the rule, and reading them confidently is a learned skill. Both run from 1 at the left to 10 at the right — a single “decade.” (The numeral printed as “1” at the right-hand end is really 10; it is often labelled to save space.)
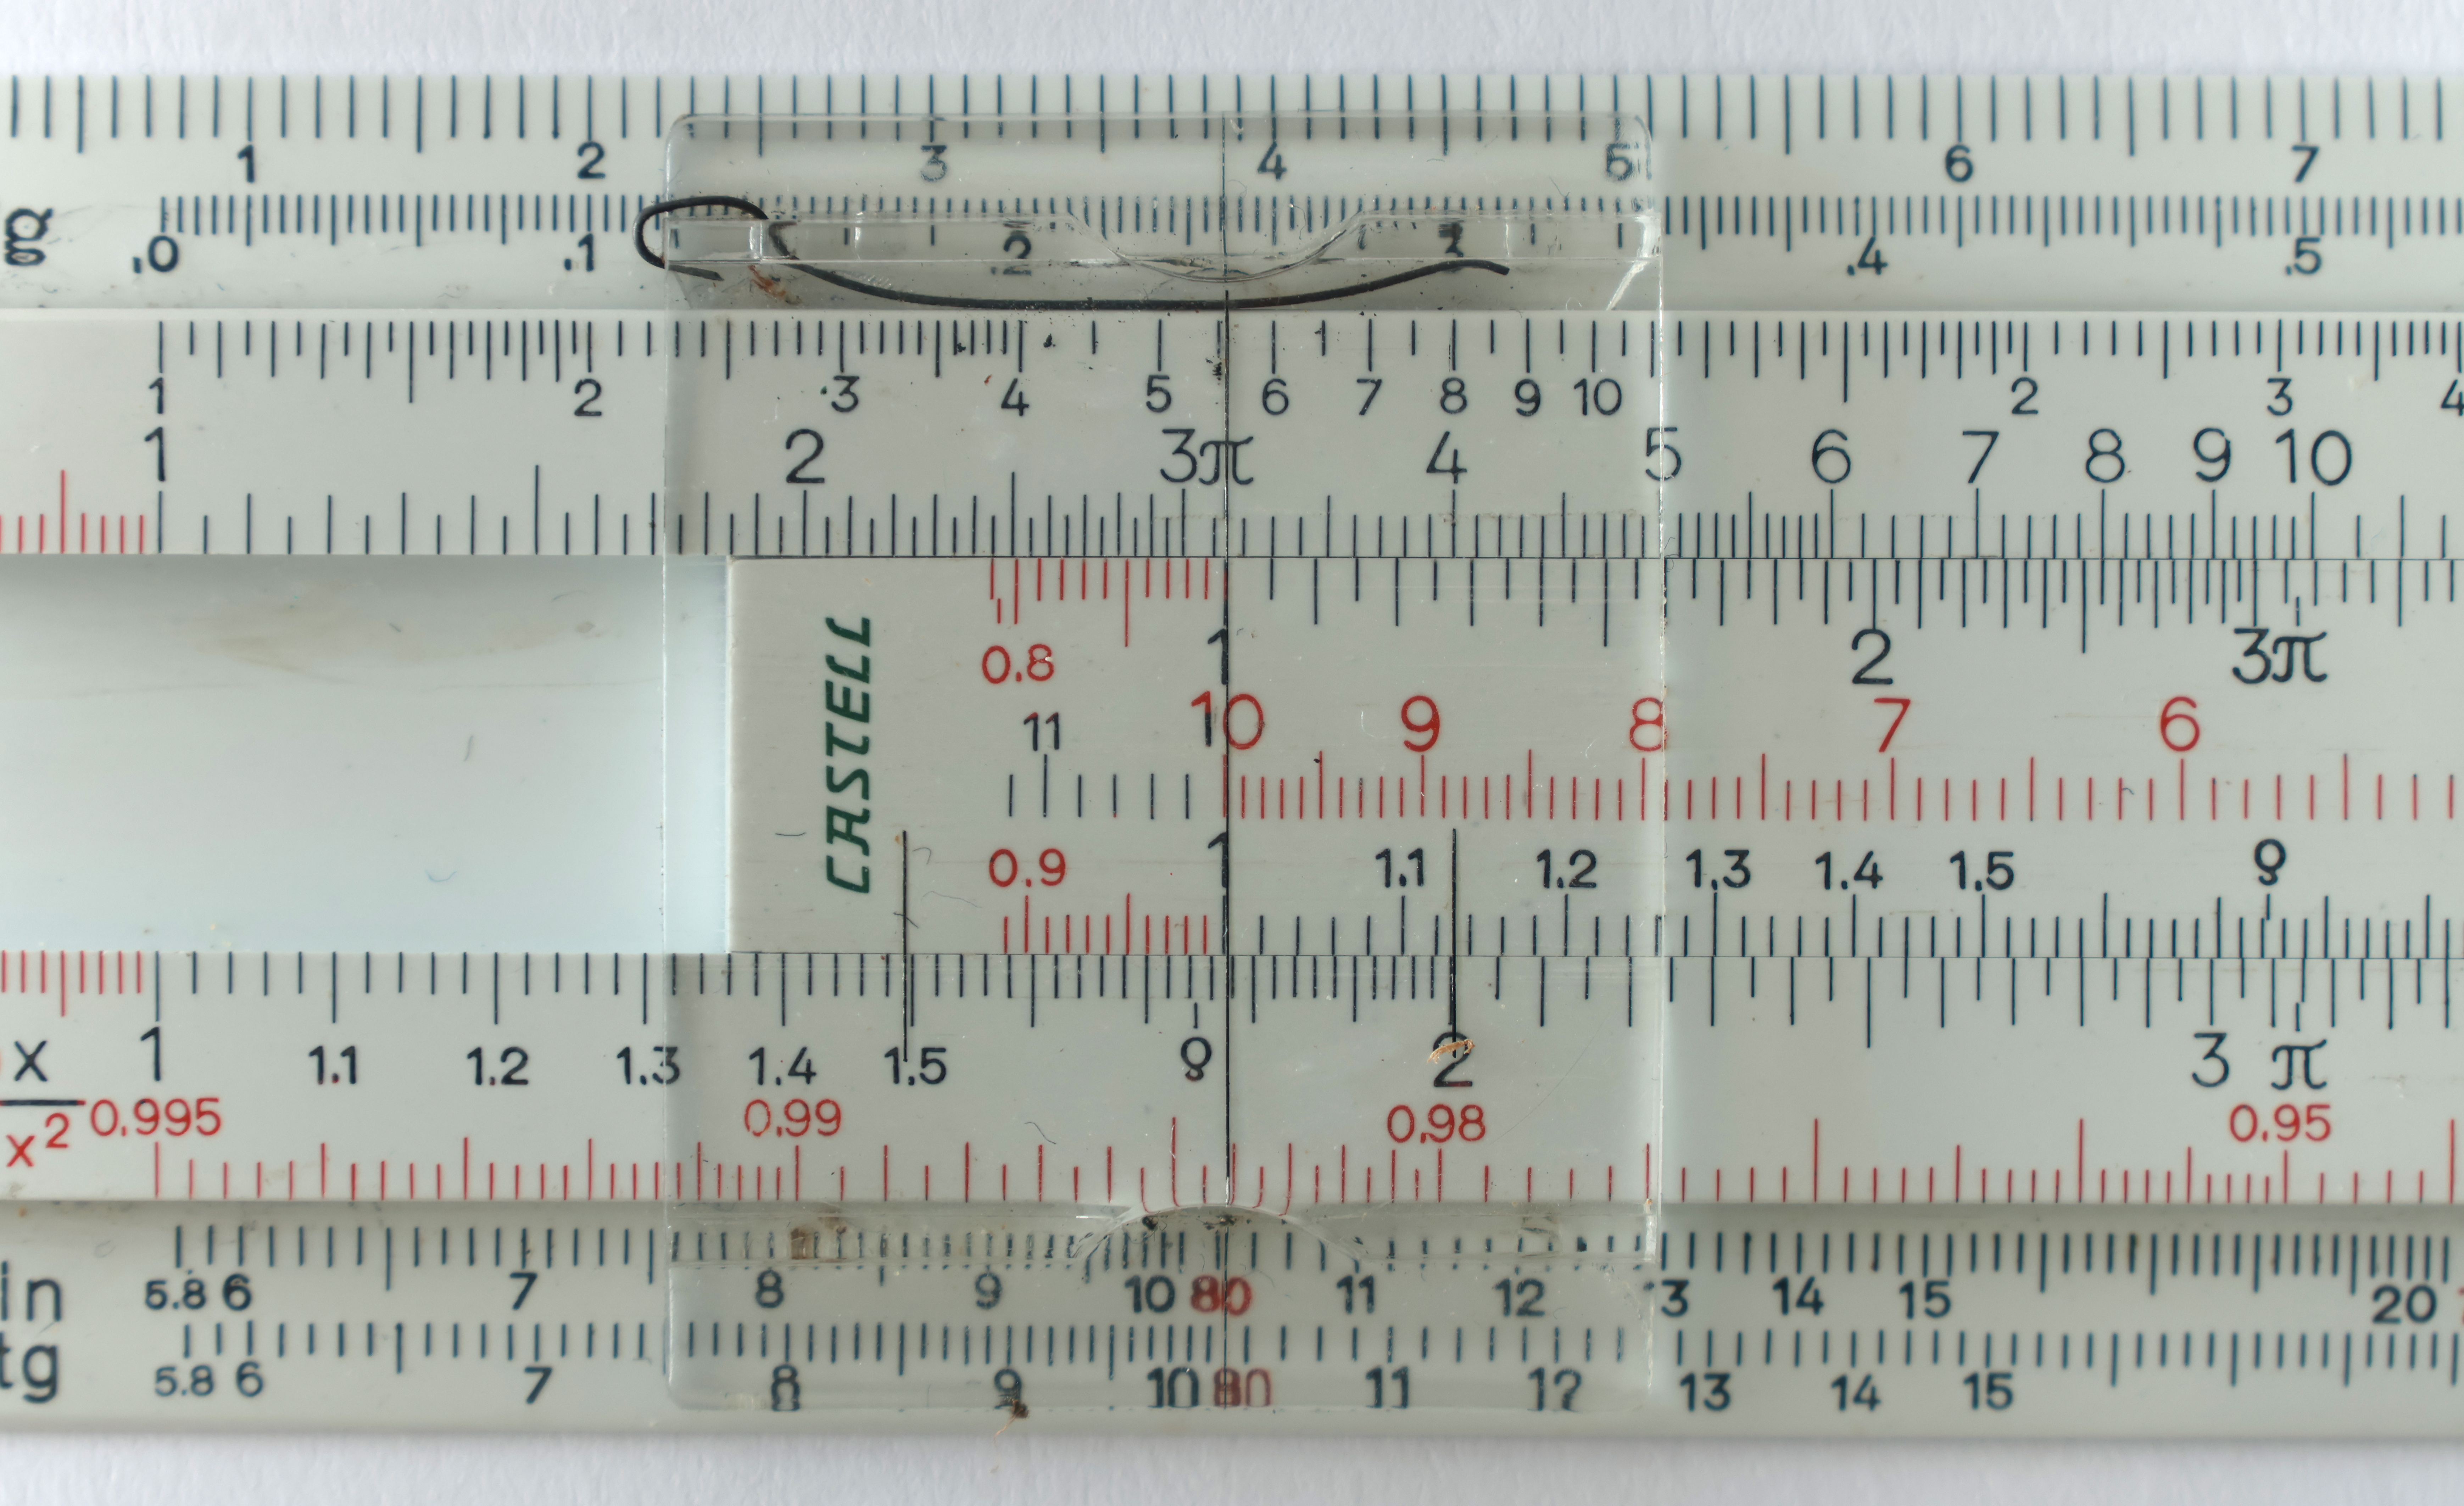
Figure 3 — A close-up of the graduations. Notice how the subdivisions between numbered marks grow coarser toward the right end of the decade: from 1 to 2 there is room for many fine ticks, but from 9 to 10 only a few will fit. Image: File:Faber Castell 67 54 Darmstadt slide rule 1.jpg by Slashme. License: CC0 (http://creativecommons.org/publicdomain/zero/1.0/deed.en). Via Wikimedia Commons (https://commons.wikimedia.org/wiki/File%3AFaber%20Castell%2067%2054%20Darmstadt%20slide%20rule%201.jpg).
The graduation scheme follows the same crowding logic as the scale itself, so the meaning of the small ticks changes as one moves rightward:
- From 1 to 2 (the most spacious stretch) the major numbered marks are 1.0, 1.1, 1.2, … 2.0. Between each pair, the fine ticks typically count in hundredths, so a reading like 1.47 can be taken directly.
- From 2 to 4 the space has tightened. Numbered marks are usually whole and half units, and the fine ticks count in fifths or in 0.05 steps; a reading of 2.85 must be estimated within the smallest interval.
- From 4 to 10 the marks are most crowded. Ticks commonly run in 0.1 steps, and any further digit is an estimate by eye of where the hairline falls between two ticks.
Two habits make the difference between a clumsy reading and a clean one. First, always identify what one small division represents in the region you are reading before you try to read it — the same physical gap means 0.02 near the left end and 0.1 near the right. Second, estimate the last figure. The hairline will rarely sit exactly on a tick; judging that it lies, say, four-tenths of the way from one tick to the next is a legitimate and expected part of the method. That estimated final digit is what gives the rule its third significant figure.
1.5 Significant Figures and Accuracy
A standard 10-inch (25 cm) slide rule yields about three significant figures — three reliable digits, the last of them often an estimate. That is the practical ceiling, set by how finely the eye can divide the physical scale. A reading of 2.85 means the operator is confident of the 2 and the 8 and is estimating the 5; a fourth digit is not available because no scale that fits in a pocket can be graduated that finely.
Three figures is less than it sounds like a limitation. For most engineering work — sizing a beam, computing a gear ratio, estimating a current — three figures is entirely adequate, and the speed of the rule far outweighs the lost precision. (Longer rules buy a little more: the scales on cylindrical and large circular rules are effectively many feet long when unrolled, pushing the readable precision to four or five figures — the subject of Vol 5.)
The crucial discipline is that the operator, not the rule, tracks precision. The instrument never rounds for you and never warns you that the third digit is shaky. Reading more figures than the scale supports is the most common beginner’s error; a result copied as “2.847” from a 10-inch rule is claiming a precision the instrument cannot deliver.
1.6 Placing the Decimal Point
Here is the single most important thing a newcomer must internalize: a slide rule gives you digits, not magnitude. The scales run 1 to 10 and know nothing about powers of ten. The rule will tell you the answer’s digits are “75”; it is entirely up to the operator to decide whether that means 7.5, 75, 750, or 0.075. The decimal point is placed by estimation — a quick order-of-magnitude calculation done in the head, in parallel with the precise digits read off the scale.
Consider the worked example 2.5 × 30:
- Read the digits on the rule. Setting the scales for 2.5 against 3.0 (the leading digits of the two factors), the answer reads 75 on the D scale. That is all the rule reports: the digit string “75.”
- Place the decimal by estimation. Round the factors to something mental: 2.5 × 30 is roughly 3 × 30 ≈ 90, or more carefully about 75-ish — clearly a two-digit number in the tens, not 7.5 and not 750.
- Write the answer. The digits “75” with the decimal point placed in the tens gives 75. Indeed 2.5 × 30 = 75 exactly, which sits at 10¹·⁸⁷ ≈ between 10¹ and 10² — an answer of order “tens,” exactly as the estimate predicted.
A reliable way to formalize the estimate is to round each factor to one significant figure and a power of ten, then combine the powers. Here 2.5 ≈ 2.5 × 10⁰ and 30 = 3 × 10¹, so the product is about (2.5 × 3) × 10⁰⁺¹ = 7.5 × 10¹ — order 10¹, i.e. tens. The rule supplies the precise digits “75”; the estimate supplies the ”× 10¹.” Combined, they give 75. This two-track habit — exact digits from the scale, magnitude from the head — is the heart of fluent slide-rule work.

Figure 4 — A preview of multiplication on C and D, with the scales set so that 2 × 3 reads as 6 on D. The rule shows only the digits; the operator places the decimal point. The full procedure — choosing the index, handling off-scale results — is the subject of Vol 2. Image: Original diagram by the Slide Rules project.
1.7 How to Hold and Set the Rule
A few physical habits make every operation cleaner and more accurate:
- Hold the rule by the ends of the body, thumbs near the rails, so the slide is free to move without binding and the cursor can travel the full length. Gripping the slide itself fights the very motion the instrument depends on.
- Move the slide with the thumbs of both hands, pushing or pinching it from the ends rather than shoving from one side, which tends to skew it in the channel.
- Set the hairline by sighting straight down onto the scale, not at an angle — looking from the side introduces a parallax error that can cost a whole graduation. On a glass cursor, get the eye directly above the line.
- Settle the cursor onto the mark from one direction. Approaching a final setting always from the same side reduces the small inconsistencies of backlash and friction.
- Keep the rule clean and the slide lightly lubricated. Grit in the channel makes fine settings impossible; a sticky slide ruins the gentle, continuous motion the method assumes.
With the parts named, the principle understood, and a feel for reading three figures and placing the decimal point, the operator has everything needed to begin real calculation. Vol 2 takes up the C and D scales in detail and turns this groundwork into multiplication and division.
Sources
- International Slide Rule Museum (ISRM) — illustrated operating instructions and the Slide Rule Self-Instruction manuals (https://www.sliderulemuseum.com/).
- The Oughtred Society — All About Slide Rules and beginner instruction notes (https://www.oughtred.org/).
- Keuffel & Esser, Instruction Manual for the Slide Rule (classic K&E manuals reproduced by the ISRM).
- A standard 10-inch rule reads to about three significant figures and the decimal-point-by-estimation method are stated consistently across these primary instructional sources; every numeric example above (log 2 ≈ 0.301, log 3 ≈ 0.477, log 6 ≈ 0.778; 2.5 × 30 = 75) was checked directly.
Comments (0)